Celebrating 20 Years of Superior Root Development 2006–2026!
Welcome to RediRoot

You made the switch. Here's how to win with it.

You already know the problem. Smooth-walled containers send roots to the wall, where they circle, kink and wait to choke the plant years after it leaves your yard. Soggy media starves roots of oxygen. And every crop runs on a tight shift-or-lose-it calendar.

RediRoot containers fix that at the root. Air at the container wall stops each root tip and pushes the plant to branch into a dense, fibrous root system that fills the whole root ball. Better roots in the nursery mean a better plant at planting time, and that quality carries into the field for years.

The change does ask a few things of you. Air-pruned plants drink faster, the media matters more and your irrigation zones need a fresh look. This guide covers each of those, based on what we've seen work for commercial growers over the past 20 years.

The 3-step plan

1

Set up right

Use a coarse, well-structured mix, fill properly and give the walls room to breathe. See Media & potting and Stepping up.

2

Re-tune water & feed

Water more often, in shorter cycles, and keep an eye on nutrients for the first few weeks. See Watering and Nutrition.

3

Air-prune every stage

Keep plants in air-pruning containers from propagation to finish, and shift on schedule. See Stepping up, Fabric and Propagation.

What changes when you switch

Smooth-wall containerRediRoot air-pruning container
Root patternRoots run to the wall and circle or deflectRoot tips stop at the wall; plant branches into fibrous roots throughout the root ball
Water useMedia holds water longer; wet spots lingerMedia dries faster and more evenly. Plan on watering more often.
MediaFine mixes are forgivingCoarser, well-drained mixes work best; very fine media can sift out of openings
Shifting upLate shifts lock in circling rootsRoots aren't circling, which gives you more flexibility. Shifting on schedule still gives the best results.
At plantingCircling roots often need to be cut or teased outFibrous, outward-ready root ball that's built to establish
Quick-start checklist

Your first 30 days

Hand this page to your crew lead. If you only read one page, read this one.

Before potting

  • Choose a coarse, well-structured mix (bark-based or with larger particle sizes). Avoid fine, silty or dusty mixes.
  • Pre-moisten the media so it doesn't shed through the wall openings or repel water at first irrigation.
  • Plan to put RediRoot containers on their own irrigation zone, not mixed in with solid-wall pots.
  • Set containers on ground cloth or gravel, not bare soil, so roots that reach the base get air-pruned too.
  • Wash and stage your propagation trays and inserts.

Weeks 1–4

  • Check moisture at least twice a day, especially on hot, windy or low-humidity days.
  • Switch to shorter, more frequent cycles rather than one long soak.
  • Lift a few test containers each morning. Learn what “wet” and “needs water” weigh.
  • Watch the windward and south/west edges of each block. They dry first.
  • Run a pour-through EC/pH test at weeks 2 and 4 to confirm your feeding program is keeping up.

Potting day

  • Fill evenly and firm lightly. Don't over-pack: roots need air space.
  • Set liners at the same depth they grew, with the root flare at the surface.
  • Leave about 1″ of headspace for watering.
  • Water in deeply until water runs from the base, then water again to settle the media.

By day 30

  • Slide a few plants out. You should see white root tips stopping at the wall and new laterals forming inside.
  • Lock in your irrigation schedule and write it down for each container type and size.
  • Put the next shift on the calendar. Air-prune every stage.

Pro tip

Mark a “sentinel” row of plants in each block. Check those same plants daily so your crew compares like with like.

The #1 adjustment

Watering: plan to water more often

This is the most common question we get, and the most important habit to change. Your plants aren't sick. They're working harder.
Why air-pruned plants drink faster

  • The walls breathe. Air moving through the sidewalls dries the media more quickly and more evenly than a sealed pot.
  • More roots, more uptake. A dense, fibrous root system pulls water from the whole root ball, not just the outer edge.
  • Less perched water. Better drainage means fewer soggy pockets, which is good for roots but leaves less water in reserve.
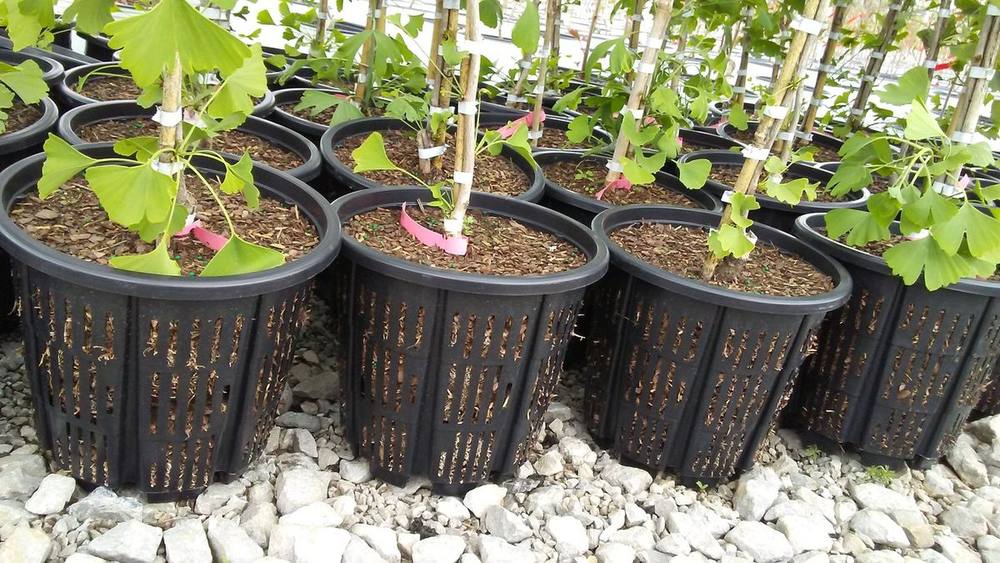
Ginkgo trees growing in black RediRoot plastic aeration containers set on gravel
Ginkgo in RediRoot plastic aeration containers on gravel. Air reaches every wall and the base.

Signs to watch for

Too dry: afternoon wilt, media pulling away from the wall, light containers by mid-day, crispy leaf margins.

Too wet: rare in RediRoot, but look for slow growth, yellowing lower leaves and media that stays dark and heavy.

How to adjust

  1. Shorter, more frequent cycles

    Two or three short cycles a day usually beat one long soak. Pulsed (cyclic) irrigation lets water wet the media instead of running straight through.

  2. Zone by container type

    Give RediRoot containers their own zones. If they share a zone with solid-wall pots, one group ends up too wet or the other too dry.

  3. Go to drip on larger sizes

    For #7 and up, and all fabric containers #10 and larger, drip emitters or spray stakes give more even, efficient coverage than overhead.

  4. Water by weight and by eye

    Lift test containers, check 1–2″ down, and adjust for the weather. Heat, wind and low humidity can change demand in a single afternoon.

Watering by RediRoot system

SystemDriesWatering approach
Prop trays & FiberCell plugsFastestMist or fog for unrooted cuttings; frequent light irrigation once rooted. Never let plugs dry out completely.
Fabric containers (above-ground)FastDrip or spray stakes on larger sizes; extra checks in heat and wind. Group closely in summer to cut wall evaporation.
Plastic aeration containersModerate–fastShort, frequent cycles. Overhead works for smaller sizes; move to drip from #7 up.
Gro n' Go liners in plastic potsModerateThe outer pot slows evaporation. Water like a plastic aeration pot and check the liner, not the outer pot.
In-ground fabricSlowestSurrounding soil buffers moisture. Water the bag zone directly and mulch the surface.
Set up right

Media, filling & spacing

Choose a mix with structure

Air-pruning containers reward a mix that drains freely and holds its shape. Most commercial nursery bark mixes work well. What you want to avoid is fine material that slumps, crusts or sifts out through the wall openings.

  • Do: composted or aged pine bark mixes, bark/peat or bark/coir blends, and mixes with perlite or similar coarse amendments.
  • Avoid: fine, dusty or silty mixes, field soil, and heavy compost-only blends.
  • Propagation: a finer prop mix is fine in cells and plugs. Keep it light and airy, and pre-moisten it.

Will media fall out?

Not with a properly textured mix. A little loss at the openings in the first irrigations is normal. Steady loss means the mix is too fine or wasn't pre-moistened.
Filling & potting

  • Pre-moisten the media so it flows and doesn't repel water.
  • Fill evenly and tap or lightly firm the media. Don't pack it hard. Compaction removes the air spaces your roots need.
  • Center the liner with the root flare at the surface and leave about 1″ of headspace.
  • Fabric containers: the topstitch helps hold the bag open while you fill. Fill to just below the top seam.
  • Water in thoroughly, then water again to settle any air pockets.
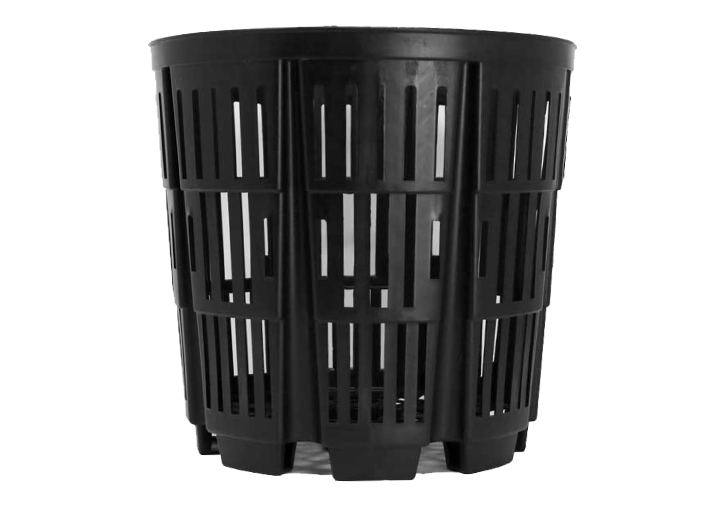
Black RediRoot plastic aeration container with vertical slot openings around the sides
RediRoot plastic aeration container. Vertical openings let air reach the root zone on every side.

Spacing & placement

  • Keep containers off bare soil. Use ground cloth or gravel so roots reaching the base get air-pruned and don't anchor into the ground.
  • Pot-to-pot is OK for small sizes and in winter, but space them out as canopies fill so air keeps moving past the walls.
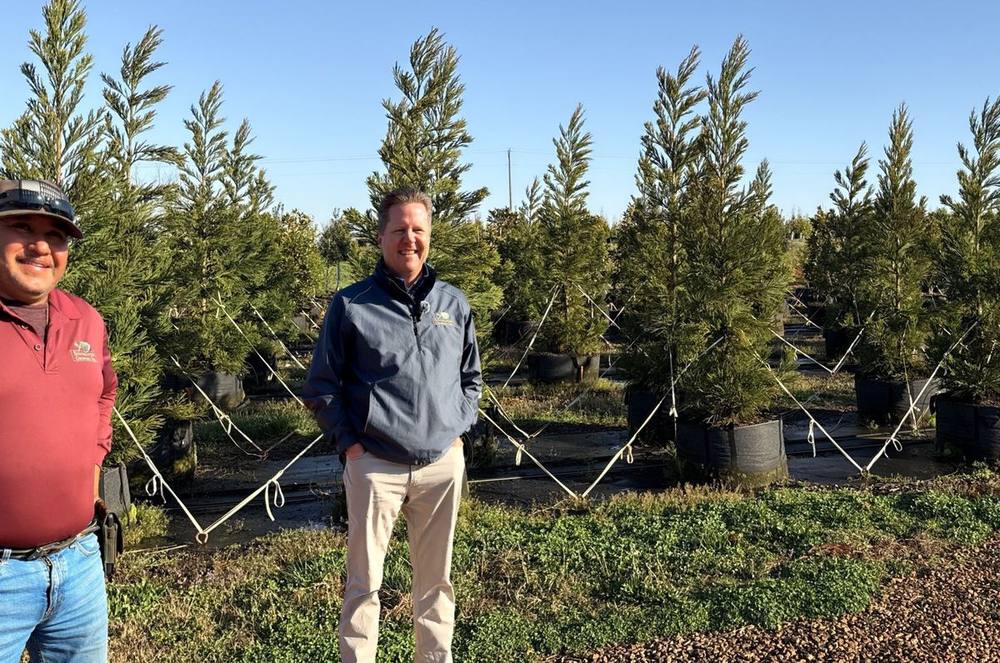
  • Stake or trellis tall stock. Light fabric containers can blow over. Use a trellis wire or block layout like the one pictured at the end of this guide.
  • Benches: raise propagation trays on open benches or racks so air reaches the bottom of each cell.

Pot-in-pot & Gro n' Go

With fabric liners inside a plastic pot, the liner does the air-pruning and the outer pot protects it. You keep your existing plastic pots, and handling and shipping stay the same.

Air-prune every stage

Stepping up: protect the roots you've built

Research shows the benefits of air-pruning hold best when plants are air-pruned at every stage, from plug to finished container. A single stint in a smooth-wall pot can bring back the circling you worked to avoid.

  1. Stage 1

    Propagate

    Prop trays, Fertil cups & Growcoons, FiberCell plugs

  2. Stage 2

    Liner / grow-on

    #1–#3 plastic aeration, fabric or Gro n' Go

  3. Stage 3

    Finish

    #5–#25 plastic, #5–#100 fabric

  4. Stage 4

    Field / landscape

    In-ground fabric or plant out

When to shift

  • Shift when the root ball holds together and you see white root tips at the wall openings. The media should come out intact without falling apart.
  • Shifting on schedule still gives the best results. Air-pruning gives you more room when shipping slips or labor runs short, because roots aren't circling while you wait. It doesn't replace a good shift calendar.
  • Move up one or two sizes, not five. Large jumps leave a lot of wet media around a small root ball.
  • Track turn times by species. Shift timing varies by species and season, so use your own records to set the calendar.

How to shift

  • Water the day before so the root ball slides out cleanly.
  • Plastic aeration pots: tip and tap. Fabric: peel the bag down. Prop cells: push up from the bottom hole.
  • No need to slice or tease an air-pruned root ball. Set it at the same depth, backfill and water in.
  • If you're bringing in liners grown in solid-wall pots, correct any circling roots before you pot them up. Air-pruning can't undo circling that's already formed.
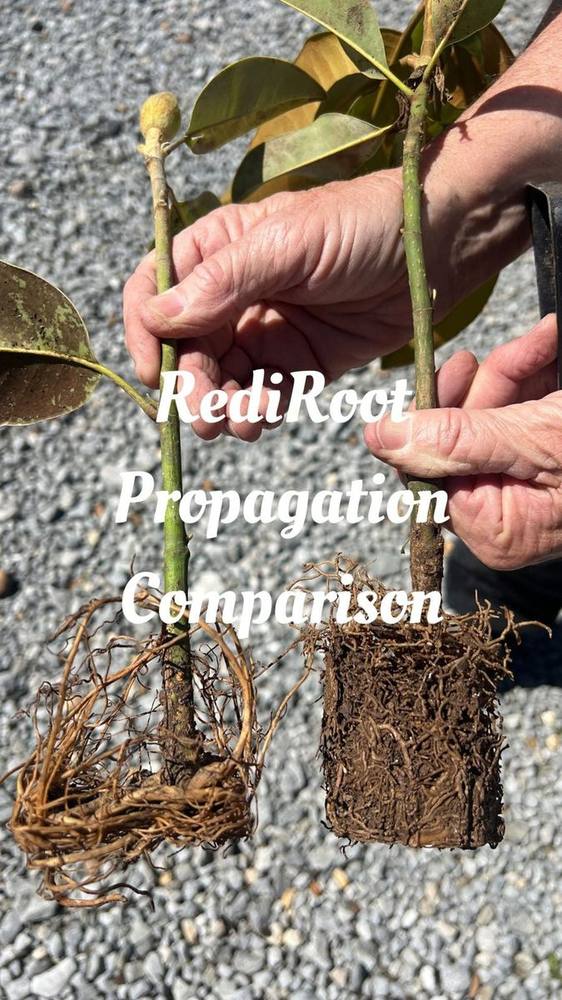
Two magnolia rooted cuttings held side by side: a circling root mass from a solid-wall cup and a dense fibrous plug from a RediRoot tray
Magnolia rooted cuttings at the same stage: from a 4″ square solid-wall cup (left) and from an 18-cell RediRoot 1020 tray (right).
Re-tune water & feed

Nutrition, heat, wind & winter

Feeding an active root system

A fibrous root system actively takes up nutrients, and more frequent irrigation can move nutrients through the media faster. Keep your program simple, but measure it.

  • Controlled-release fertilizer (CRF) is the easiest base. Incorporate or top-dress at your normal label rate.
  • Top-dressing? Apply evenly across the surface so drip or overhead water moves it through the whole root ball.
  • Monitor with pour-through tests every 2–4 weeks in season. If EC trends low, add a supplemental liquid feed or a light top-dress instead of raising the CRF rate across the board.
  • Watch pH if you've increased irrigation volume, especially with alkaline water.
  • Propagation: begin a light liquid feed once roots appear at the cell wall.

Good news

Since air-pruned plants are less likely to sit in waterlogged media, you'll often see fewer “wet feet” symptoms that look like nutrient problems but aren't.

Heat & sun

  • Evaporation through the walls helps moderate root-zone temperature, but it also uses water. On hot days, plan an extra mid-day check.
  • Black fabric and plastic absorb sun. On the exposed south and west edges of a block, shade the edge row or turn containers so foliage shades the wall.
  • Group fabric containers more tightly in peak summer to cut side evaporation, then re-space as canopies grow.

Wind & blow-over

  • Fabric containers are lighter than plastic. Use a trellis wire, staking or close block layouts for tall, top-heavy stock.
  • Wind dries containers fast. The windward rows need water first.

Overwintering

Open walls that let air in also let cold in. Root zones in aeration containers can get colder than in solid pots, so protect them the way you'd protect any above-ground root system.

  • Consolidate pot-to-pot before hard freezes so containers insulate one another. Protect the outer edge of each block.
  • Use frost cloth, microfoam or overwintering houses for tender or root-sensitive species, as you would in any container.
  • In-ground fabric: surrounding soil buffers temperature. Mulch the surface.
  • Water before a freeze. Moist media holds heat better than dry media, and air-pruning containers can dry out in cold, dry winds.
  • Keep checking moisture in winter. Containers can dry more than you expect, even when it's cold.

Roots escaping the container?

Roots that grow through openings are pruned by air, as designed. If they keep growing, something is giving them moisture: soil underneath, a wet mat or a neighboring container. Move containers onto gravel or ground cloth and space them slightly.
Product guide

Fabric containers & Gro n' Go liners

Above-ground fabric

  • Fabric dries fastest of any container. Expect the most frequent watering, especially in the first weeks and in summer. Drip is strongly recommended from #10 up.
  • Fill to just below the top seam and settle with water. The bag will firm up as roots fill it.
  • Lift and move by the handles, never the trunk.
  • Set on ground cloth or gravel. On bare soil, roots can grow through the base. Lift or rotate bags each season if you see that.

In-ground fabric

  • Dig a hole slightly larger than the bag. Set the top seam at or just above grade so roots don't grow over the top. Backfill firmly.
  • Roots air-prune or are restricted at the fabric, which builds a compact, fibrous root ball inside the bag for harvest.
  • Harvest: lift bags with a mechanized tree spade, or slide forklift prongs under the bag all the way to the center and lift. Knock excess soil off the outside of the bag with a shovel and trim any roots on the outside of the fabric.

Gro n' Go liners

  • Place the fabric liner inside your existing plastic pot, then fill and plant as usual. The liner air-prunes while the pot provides structure.
  • Ship in the liner. Customers lift the plant out with less weight and no hard edges against trunks.
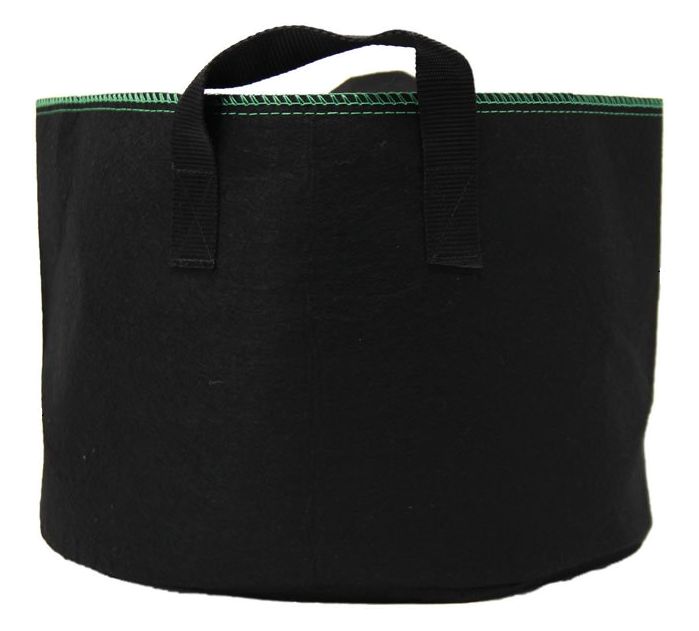
Black RediRoot fabric aeration container with reinforced handles and green topstitching
RediRoot fabric containers: reinforced handles, BPA-free fabric and a topstitch that holds the bag open while you fill.

Available sizes

  • Above-ground: #1 to #100HD (1–101 gal)
  • In-ground: 10″ to 30″ (3.4–55 gal), with or without handles
  • Gro n' Go liners: #1 to #25

Full specs at RediRoot.com/specifications

Important at planting

RediRoot fabric containers and liners are built to be reused, not buried. Always remove the fabric before planting into the landscape or field. See Planting out.

Care & reuse

RediRoot fabric is made from recycled material and designed for multiple seasons. Between crops, empty the bag, let it dry, brush off the media, and store it out of direct sun. Rinse with water. Avoid harsh chemical cleaners.

Product guide

Propagation trays & FiberCell™ plugs

Long-term root architecture is set in propagation. Getting this stage right pays off at every stage after it.
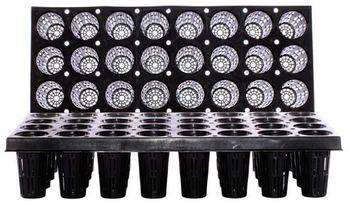
RediRoot aeration propagation tray with open-wall cells held in a rack
RediRoot aeration propagation tray: open-wall cells in a rack.

RediRoot aeration prop trays

10×20 single-unit trays: 18 and 32 cell. Classic rack & cup systems: 18, 32 and 48 cell.
  • Raise trays on open benches so air reaches the cell bottoms. Don't set trays on solid surfaces or capillary mats.
  • Fill with a light, pre-moistened prop mix and tap to settle. Don't press cells tight.
  • Cells dry quickly. Use mist or fog for unrooted cuttings, then frequent light irrigation once rooted.
  • Removing plugs: push up through the hole in the bottom of each cup. The root ball should come out whole.
  • Fertil® cups & Growcoons: use them in RediRoot trays for transplant flexibility. Plant the whole cup or Growcoon without disturbing the roots.
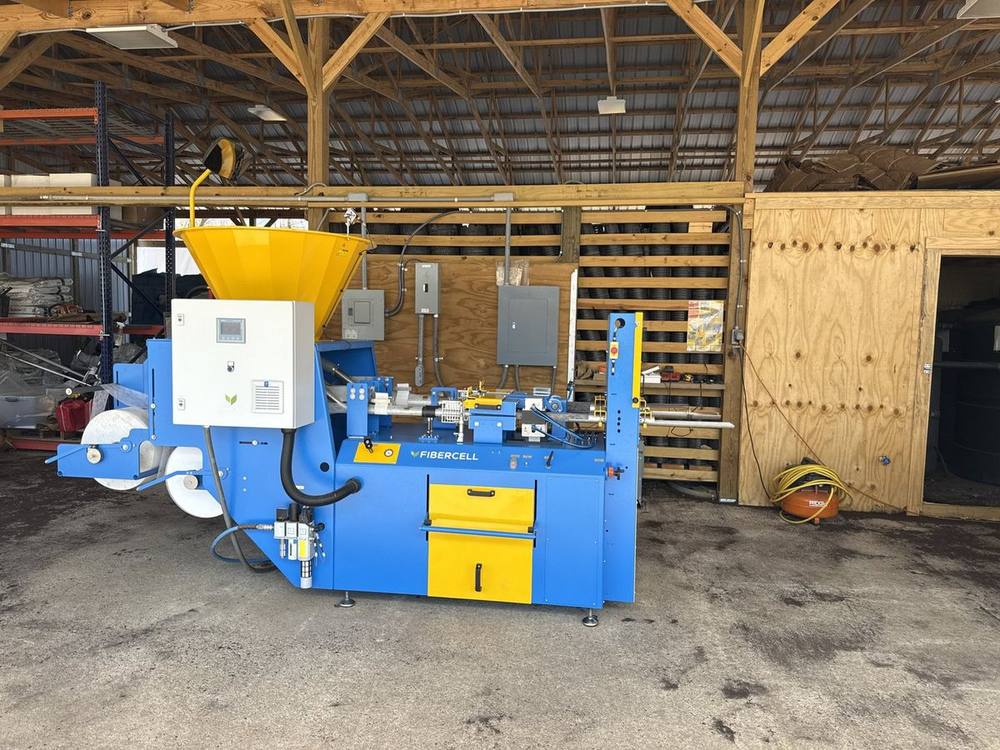
Blue FiberCell machine with a yellow media hopper inside a nursery work shed
FiberCell machine forming paper-wrapped plugs on site.

FiberCell paper plugs

A FiberCell machine wraps your mix in biodegradable, plastic-free paper to make uniform plugs on site. Paper options last roughly 4–14 months, depending on paper type. FiberCell paper is free of plastics, and there are no plastic cells to wash or throw away.

  • Match the paper to your crop cycle. Use faster-degrading paper for short crops and longer-lasting paper for slow-rooting species or long holds.
  • Hold plugs in RediRoot trays or holders with open sides and bottoms. Roots air-prune at the paper wall.
  • Keep plugs evenly moist. Paper wicks water and dries faster than the media inside. Don't let plugs dry out completely, because dry paper is slow to rewet.
  • Plant the whole plug, paper and all, into the next container or the field.
  • Bury the paper completely. Paper above the soil line wicks moisture from the root ball. Cover the top edge with media or soil.

No cup needed

This cutting came straight out of a RediRoot 1020 tray, with no Fertil cup or Growcoon. The roots hold the plug together on their own.

What you're aiming for: white root tips stopped at the cell or paper wall, with fibrous laterals filling the plug. When you pull the plug, it holds together and the media doesn't fall away. Then it's ready to shift.
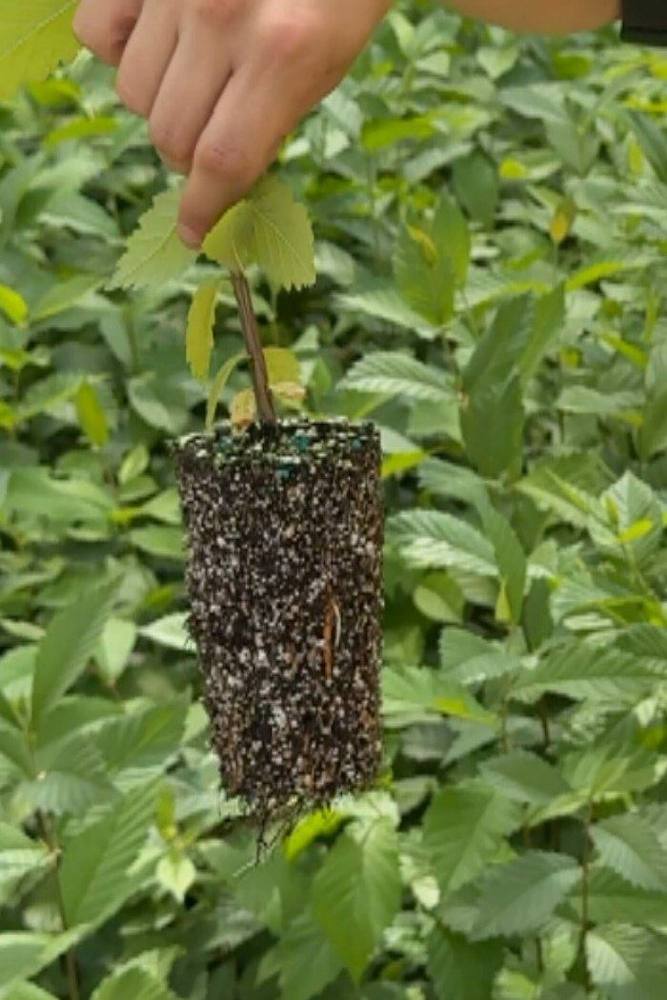
Hand holding a rooted cutting whose plug of media is held together by white fibrous roots
For landscapers, retailers & their customers

Planting out: built to establish

A RediRooted plant arrives with a fibrous, outward-ready root system. A few simple steps at planting help it get established quickly.

Planting steps

  1. Water the container first

    Soak the root ball an hour before planting. Air-pruned root balls in container mix dry faster than the soil around them.

  2. Remove the container

    Slide plastic pots off. Peel away fabric containers and Gro n' Go liners completely. Fertil cups, Growcoons and FiberCell plugs go in whole. Just bury the top edge.

  3. Set it at the right depth

    Dig wide, not deep, and set the root flare at or just above grade. No need to slice or tease an air-pruned root ball.

  4. Backfill, water, mulch

    Backfill with native soil, water deeply to settle it, and mulch 2–3″ deep, keeping mulch off the trunk.

  5. Follow up on watering

    Check the root ball (not just the surrounding soil) 2–3 times a week for the first several weeks, more often in heat. Taper off as roots move into the native soil.
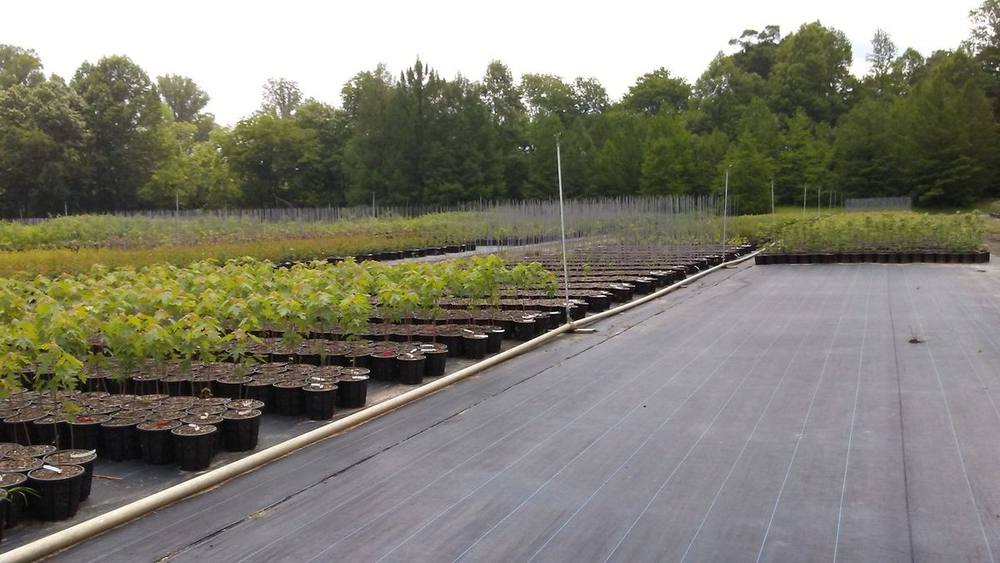
Rows of plants in RediRoot containers on ground cloth at a commercial nursery
RediRoot containers in nursery production.

For retail & garden centers

  • Air-pruning containers dry faster on display benches. Put them on a daily check, and twice a day in summer.
  • Group them together so staff water them on their own schedule.
  • Tell shoppers why the pot has openings. It's a selling point: “Roots that don't circle, built to establish in your yard.”
  • Remind customers to remove fabric before planting.

What to expect

Air-pruned roots are already pointed outward and branching. The aim is a plant that settles into the landscape and keeps a sound root structure for years. Outcomes always depend on site, species and aftercare.

Quick fixes

Troubleshooting guide

What you seeLikely causeWhat to do
Afternoon wiltIrrigation hasn't been adjusted for faster dry-down; hot or windy conditionsAdd a short mid-day cycle; check emitter output; consider drip for larger sizes
Media washing or sifting outMix too fine; media was dry at potting; strong overhead waterUse a coarser bark mix; pre-moisten; lower overhead pressure. Some loss in the first week is normal.
Water runs straight throughDry media has become water-repellent; cycles too longPulse irrigation (2–3 short cycles); add a wetting agent if needed; don't let media dry out completely
Roots anchored into the groundContainers on bare soil or a wet surfaceMove to ground cloth or gravel; lift or rotate fabric bags each season
Circling rootsLiner grew in a smooth-wall pot; a stage skipped air-pruningCorrect circling at shifting; keep plants in air-pruning containers at every stage
Containers blowing overLight fabric bags; tall canopies; open spacingTrellis wire, staking or tighter blocks; step up to a wider size
Uneven dry-down across a blockMixed container types or sizes on one zone; edge effectsRe-zone by container type; extra emitters or hand-water edge rows
FiberCell paper hard or dry on topPlugs allowed to dry; paper exposed above the mediaKeep plugs evenly moist; bury the paper edge when transplanting
Winter root damageRoot zones exposed to hard freezesConsolidate pot-to-pot, protect block edges, use frost cloth or an overwintering house; water before a freeze

Still stuck? Send us a photo.

Slide a plant out of its container, take a photo of the root ball and the top of the plant, and send it to grow@rediroot.com with your mix, container size and irrigation schedule. Our team will help you dial it in.

Frequently asked

Questions growers ask us

It depends on container type, size, mix, species and weather, so we don't publish a single number. Expect more frequent irrigation, especially in fabric and in the first few weeks. Begin with extra checks and shorter cycles, then lock in a schedule by day 30.

We don't recommend it. They dry at different rates, so one group ends up over- or under-watered. Zone them separately.

Root tips that reach the openings meet air and stop. That's the air-pruning working. If roots keep growing outside, they're finding moisture (soil, a wet mat or the next pot). Move the containers onto gravel or cloth.

For the best results, yes. Air-pruning gives you more flexibility when schedules slip, but timely shifts still produce the best plants.

A bigger smooth-wall pot only gives roots more distance to travel before they circle. Air-pruning changes the root architecture itself.

Most coarse, bark-based nursery mixes work well. Avoid fine, dusty mixes and field soil. See Media & potting.

RediRoot plastic and fabric containers are built for many commercial seasons. Some growers have used theirs for nine years or more. Store them out of direct sun between crops.

RediRoot containers are made with recycled material, and our fabric is BPA-free. FiberCell plugs use biodegradable paper that is free of plastics.

Remove fabric containers and liners before planting, plant Fertil cups, Growcoons and FiberCell plugs whole, and keep the root ball watered for the first several weeks. See Planting out.

Call (800) 654-2116, email grow@rediroot.com or contact a RediRoot grower specialist below.

You're the grower. We're here to help.

Picture your next crop: no circling roots, plants that slide out clean and customers who keep coming back.

That's what RediRoot growers have built for 20 years. If you have a question about watering, mix, sizing or a crop that isn't behaving, reach out. A real grower specialist will help you dial it in.

Talk to a specialist

Chris Murphey · 770-542-7229
Chris@RediRoot.com
RediRoot

(800) 654-2116 · grow@rediroot.com
RediRoot.com · @rediroot

Two growers standing in front of rows of trees in fabric containers held upright with trellis wire
Pictured: in the field at Southeastern Growers. RediRoot is a brand of NurserySource.